Quilting with tubes
Paint Shop Pro� 8

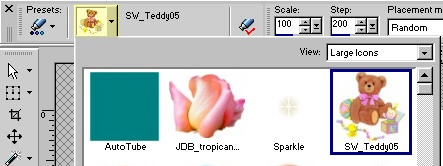
* Please note-For the small Screen Shots, please click on them for a large view or use the text instructions... *

For this tutorial, I am using a tube. Please visit - http://www.samsworldhome.com and get a tube to work with.  Please do not use the below graphic, or the tutorial will not work correctly. You must use a tube.


teddy05

Step 1: Open a new image with these settings:

Image Dimensions:
 Width: 300 pixels
 Height: 300 pixels
 Resolution: 200.000

Image Characteristics:
 Raster Background checked
 Color Depth: 16 Million Colors (24 bit)
 Color: Transparent


Screen Shot 1

Step 2: Select your tubes tool and choose your tube, tubes with lighter or pastel colors give the best results, center it on your background and left click to apply your tube. You may have to adjust the Scale to get the tube to fit your background properly.


Screen Shot 2

Step 3: Select your magic wand tool using these settings:


Screen Shot 3

Click on the transparent area around your image and the ants will outline both your image and the background.

*Note*-To select more than one part of the image, click with the magic wand again until all transparent parts of your image are selected.

Step 4: Go to Selections-Invert and your ants will now only be around your image as shown in Screen Shot 4.


Screen Shot 4

Step 5: Go to Layers-Duplicate and duplicate the layer.


Step 6: Go to Adjust/Blur/Gaussian Blur and apply a radius of 3.01 as shown in Screen Shot 5:

Radius: 3.01


Screen Shot 5

Step 7: Go to Effects/Texture Effects/Emboss.


Step 8: Go to Adjust-Add/Remove Noise-Add Noise as shown in Screen Shot 6:

Uniform checked
Noise: 6%


Screen Shot 6
Step 9:  Go to Layers-Properties and set it as shown in Screen Shot 7:

Name: Copy of Raster 1
Blend Mode: Multiply
Opacity: 100
Link set: 0
Layer is visible checked


Screen Shot 7

Step 10: Go to Layers-Merge-Merge All (Flatten)


Step 11: (Optional, this step only applies if you are going to copy your finished graphic onto a seamless background or colored background of your choosing.  You may also Export as picture tube).  Click Ctrl + C to copy, then paste as a new selection or paste as a new layer onto your seamless background image giving you a result similar to this:

If your image is too dark, repeat Step 9 replacing the 'Multiply' with 'Lighten' and Opacity from 100 to 80 or lower.


: Home :  : PSP Tutorials :  : OE5 Stationery :  : Applets :  : Friends :  : Frames :
: Awards :  :Webrings :  : J's Web Design :  : Inspired Scripting :  : Web Sets :
: Sign the Guestbook :  : View the Guestbook :

Copyright � 2003 Jacinda's Web Design
Hit Counter